A wooden cutting board is an underrated but important part of many kitchens. These cutting boards allow you to cut food and groceries in different shapes safely.
Usually, these cutting boards have designs that enable them to last for decades. However, there is a small task of seasoning to do if you want it to last as expected.
Seasoning a wooden cutting board is straightforward, so you do not need any professional help with the process. However, some set-out processes and technicalities are involved in the seasoning process. Luckily, these technicalities do not require special tools, so you can take them on.
This article will provide a step-by-step guide on how to season your board. If you follow the steps provided in this guide, you will season the cutting boards like a pro.
JUMP TO: Preparing Workspace | Clean the Board | Airdrying the Cutting Board | Choosing oil | Oiling the Board | When to Re-season the Board|
- Prepare working space
- Clean cutting board
- Air dry cutting board
- Put the board on a flat surface and pour oil
- Oil sections by section, depending on the size of the board
- Rub oil in as you apply it
- Pour out excess oil
- Air dry the board to allow the oil to seep into the board
Prepare The Workspace and Get The Necessary Tools
The first thing to do is prepare the area for the seasoning activity. You need enough space for the seasoning board to lay flat and more room for tools. Create space for two wood cutting boards, and you’re good!
After preparing the space you need, the next step is to get the necessary tools for the job. The next question is, what are the tools required for the oiling job?
What are the tools needed for seasoning a cutting board
The following tools are great to have if you want to season a wooden cutting board;
- Teaspoon
- Flat surface
- Clean and non-piling fabric
- Rag or paper towel to clean the excess board oil
- Soap
- Cloth to clean wooden board after washing
Each one of these tools has its specific uses to ease the process of seasoning the wooden cutting board.
Source: Home Stratosphere
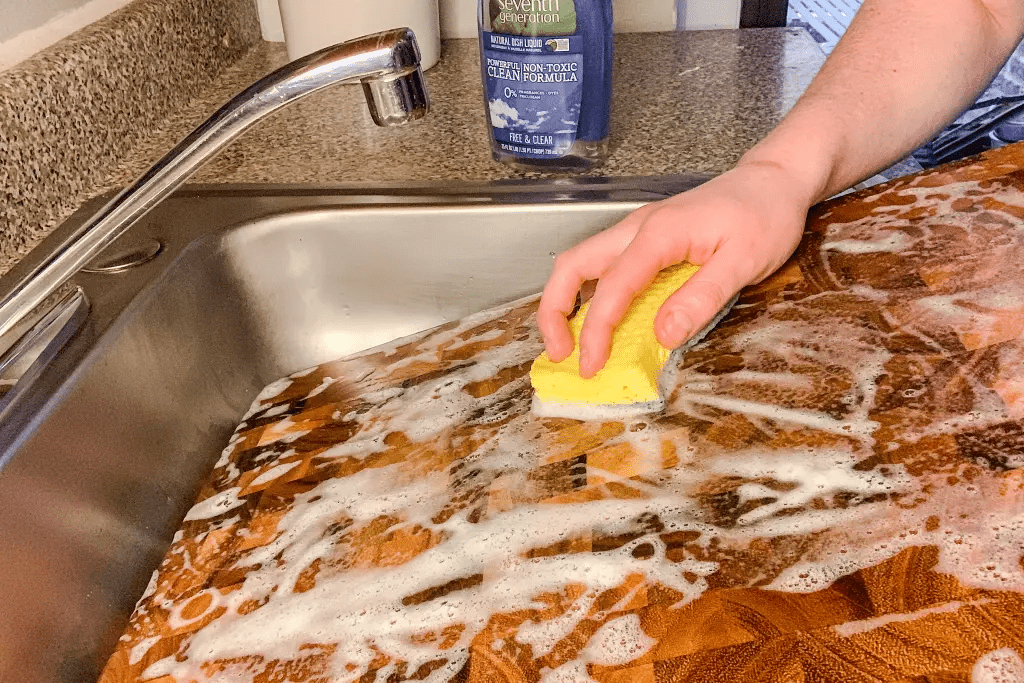
Clean and Prepare The Board for The Seasoning Process
At this point, you have all the necessary tools, and your board is on a flat surface. The next step is to clean the board before you oil it. The cleaning process is easy since regular soap and water are sufficient.
Again, it follows some specific processes.
Related Read: Acacia Vs. Teak Cutting Board – Here’s What To Buy!
How to clean a cutting board?
The first step to note is all wood-cutting boards require washing with your hands. Refrain from fixing it in a dishwasher to clean it. If you are busy, wait until you have the time to wash this equipment with your hands.
CAUTION: Dishwashers can cause warping and crack in the board.
Here is the step-by-step process to wash a wooden cutting board.
- First, remove every bit of food that sticks on the board’s surface. While using the board, food sticks to it, and washing with a sponge may not get it out. It’s best to use a bench scraper for this task. If you have a new cutting board, skip this step.
- Place the board in an empty sink and wash thoroughly with your sponge and soap. Scrub it as entirely as possible, even if it is a new cutting board. The last thing you want is the oil saturating alongside dirt or debris.
- Rinse the board thoroughly – the rinsing process should be more thorough than the cleaning. Use large amounts of water for the cleaning process to remove all forms of soap.
- Dry the board. Again, do not put the wooden cutting board in a dryer; allow it dry naturally. Of course, this can take several hours.
TIPS: If you have used the board to cut meat or fish, you should clean it with a hydrogen peroxide water solution
Source: The New York Times
How to sanitize the cutting board
If you have a new board, sanitizing it may be unnecessary. However, if you have used the board for many years, you need to sanitize the board correctly. Sanitization is necessary to remove all dirt that may have built up over time.
There are two ways to sanitize your wooden cutting board;
- With vinegar
- With lemon
Note: The Environmental Protection Agency does not rate vinegar as a disinfectant, although it removes dirt and debris excellently.
Here’s how to clean the cutting board with vinegar;
- Get a spray bottle
- Mix a solution of white vinegar and water. The water should be four times the vinegar content in the solution. That means if you have one cup of vinegar, it should have four water cups in the spray bottle.
- Spray the board’s surface and, if you want, all parts of the wooden cutting board.
- Wait for around five minutes to allow the vinegar solution clean thoroughly.
- Rinse the wood-cutting board with a lot of water.
- Air dry it for a long while
TIP: The vinegar solution may leave its scent and taste on the wood cutting board, so you can wash it lightly after using vinegar.
Here’s how to use lemon to sanitize your cutting board;
- Cut the lemon into equal halves.
- Dip one-half into coarse salt
- Use the lemon and the salt to clean the wood-cutting boards thoroughly.
- You can also pour the salt on the board and scrub it with the lemon.
TIPS: You can add baking soda to the lemon cleaning process, as it helps remove unwanted smells.

Source: Momtastic
Inspect and Air Dry The Cutting Board
Cleaning the wood-cutting board is the hardest part of the seasoning process. Once finished, the next thing is to oil the board. However, doing small checks is necessary.
First, air-dry the board for several hours to remove all the excess moisture from the cutting board. Oiling with water on the board is never successful because oil and water do not mix.
After air drying the board, the next thing is to check for any defects. Wooden cutting boards help you cut food with knives. Sometimes, the blades can create holes in the board and make it rough.
Oiling a rough board is a near-impossible task because all the oil will stay within the holes instead of spreading across.
CAUTION: If you notice mold and mildew on the board, you need to replace the board completely.
What to do if the board surface is rough
A wooden board’s surface being rough is normal. However, you can’t oil the board with a rough surface.
Before you even clean the surface, ensure you use sandpaper to make the surface a flat one. The sandpaper you pick first should have a medium grit of around 100.
After sanding with the first one, you can use sandpaper with reduced grit. That way, you’re sure that the surface is flat.
NOTE: Purchasing a new board is usually better if the roughness is a lot.
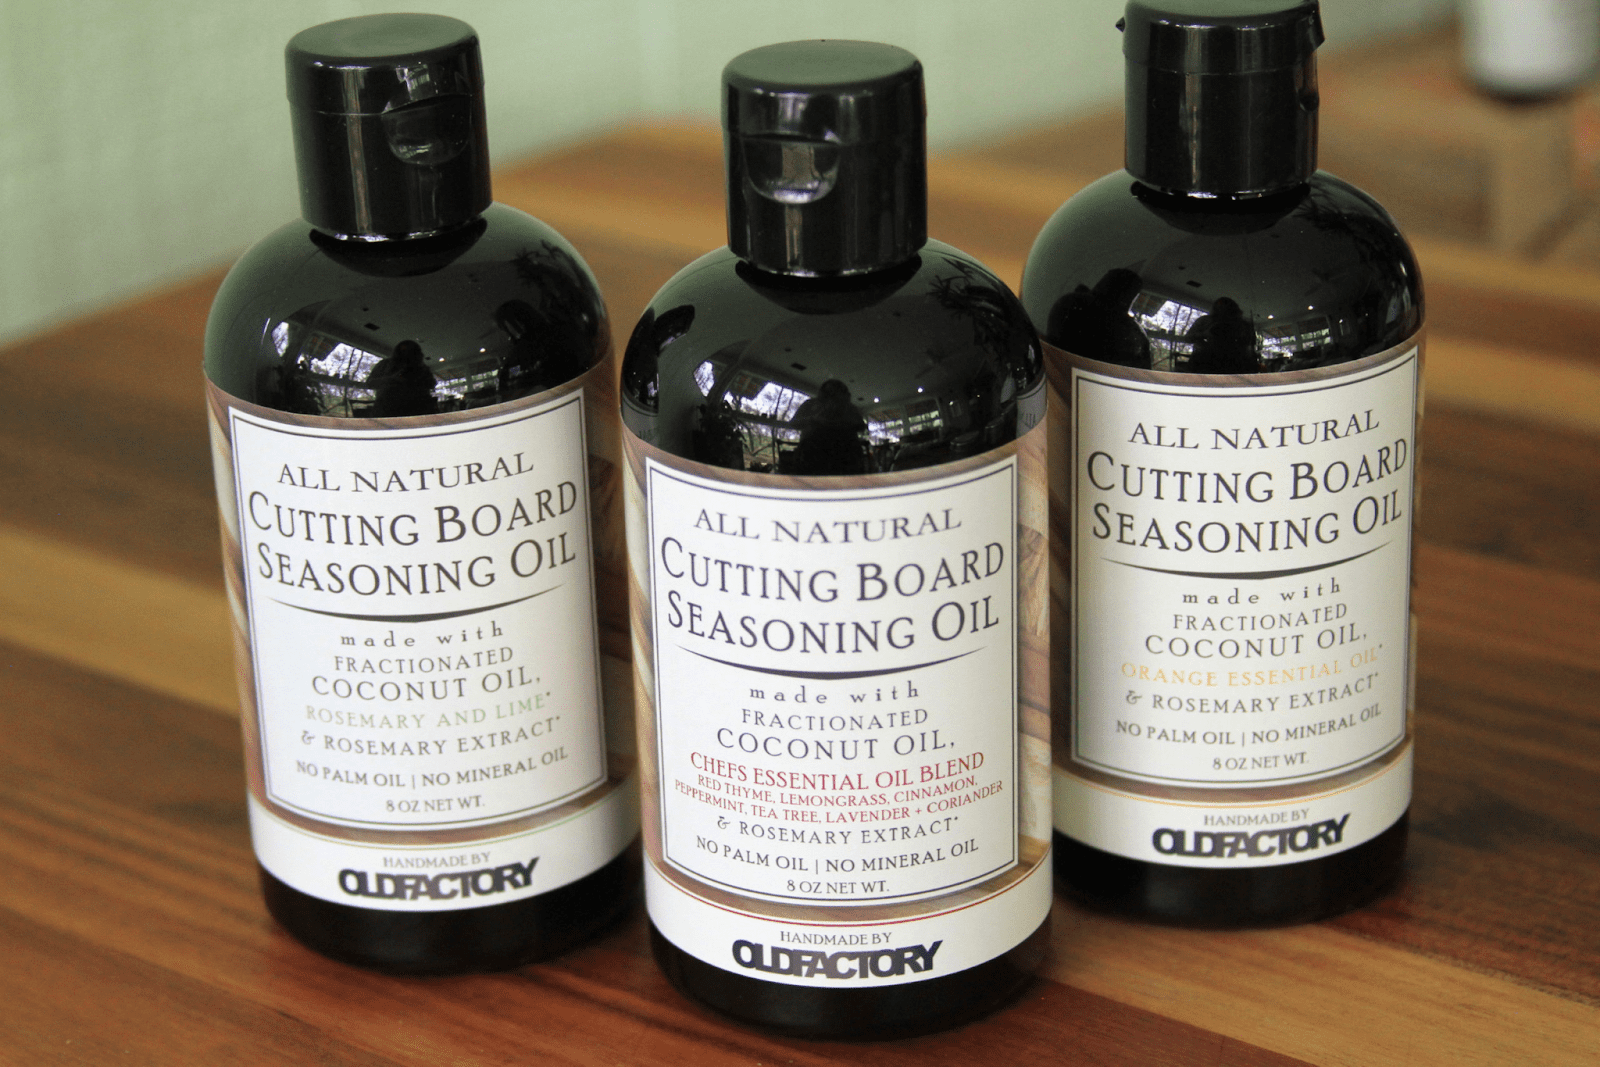
Choose The Appropriate Oil to Use
If you want to season your board, only some oils are the right ones. You need to understand the different types of oil to use and pick the right one.
According to Masterclass, food-safe mineral oil is the appropriate option. However, only some types of mineral oil are the best.
The main idea behind your oil choice is to ensure the oil has no unsaturated fat. For example, if you use olive oil, your board will smell and damage easily.
This oil will trigger free radicals due to oxidation when exposed to oxygen. This will cause it to smell, and it will also affect every meal cut on the board.
Also Read: Can You Stain Cutting Boards? [Methods+Stain Alternatives]
What are the appropriate oils to use and not use
Using the right mineral oil is crucial to the seasoning process for your cutting board. Let’s examine some oils and determine whether they are ideal for cutting board seasoning.
- Mineral oil is a general name for oils with no smell or color. Usually, this oil results from petrochemical processes, but it is effective at seasoning your board.
- However, research suggests that mineral oils are amongst some of the most significant sources of contamination in our bodies. These oil types are common, making the price a bit cheap.
- Coconut oil: This oil type is arguably the best for cutting board seasoning. You can get the raw oil from the plant, but it is always better when you distill it. This oil has no awful smell, and more importantly, the oil doesn’t go rancid.
- Canola and olive oil: As described above, these oils have high levels of unsaturated fat and are inappropriate.
NOTE: There are some specific oils made for seasoning on a cutting board that you can try.
Source: Old Factory Soap
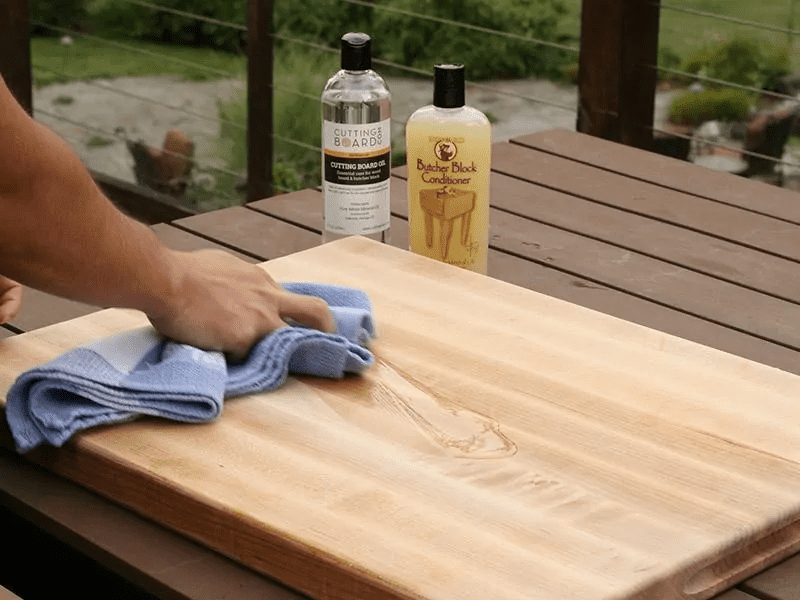
Oil the Board Appropriately
If you want your oiling process to be effective and last long, you must do it correctly. Here is the step-by-step procedure to pour the oil;
- Place the board on a flat surface. Oil is liquid, so it’ll flow in that direction if there’s a slope.
- If you have a pot lid holder, you can keep the board in it for better oil control.
- Divide your board into different sections. Depending on the size and shape of the board, you need to have a division of the board parts. You can use the oil to divide the sections faintly.
- Pour oil gently into one section. You can use the teaspoon to pour it gently to avoid an overflow.
- Rub the oil into the board. When you pour oil into a board, a significant part stays on the surface, with the wood absorbing only a little. You need to use a clean cloth to rub the oil on that surface into the board with a bit of pressure.
- Move to another section and repeat the process.
- Rub oil, in general. After applying all sections to the cutting board, you need to use a cloth to add oil to the whole body. This ensures an even distribution of the oil on the surface.
- Air-dry the board. After applying the oil evenly, the next step is to dry the board completely. Ensure you keep the board flat while air drying it. Doing that will ensure that the oil doesn’t flow from the surface.
CAUTION: Take time to rub all sections with the same force to get an even result.
How Often Should You Oil Board
How frequently you need to oil your board depends on the usage frequency. If you use the board sparingly, then not oiling frequently is okay. However, if you use the board frequently, you must season it often.
Oiling every month is a good base if you usually cook. However, as a chef, your oiling must be done weekly. Luckily the board will show some signs when it’s time to reseason
How to Know When to Re-season The Cutting Board
There are different ways to know it is time to reseason your board. Some of the signs include;
- Some parts of the board are getting lighter. It’s impossible to use all parts of the board evenly. The parts you use the most will need re-seasoning before others, and they will usually have a lighter shade.
- Wood cutting board absorbing water. Water drops should typically sit on the surface if your board has oil. When you notice the wood cutting board absorbing water, it is time to season it.
- If the board has some unwanted smells, you must reseason it and clean it thoroughly.
Conclusion
Seasoning your board isn’t a daunting task, but it requires patience. The only daunting task described above is the cleaning and sanitizing section.
Sorry, this section has no escape, as you need to season only a clean board. Think about it; your body will fare better if you cook clean food only.
![27 Types of Cutting Boards Explained [Buying Guide Included]](https://houseadorable.com/wp-content/uploads/2022/12/cutting-board.jpg "27 Types of Cutting Boards Explained [Buying Guide Included]")
![Wood Cutting Board Vs. Plastic Board [Which is Safer?]](https://houseadorable.com/wp-content/uploads/2023/01/wood-board.jpg "Wood Cutting Board Vs. Plastic Board [Which is Safer?]")
![Charcuterie Board Vs. Cutting Board [8 Differences]](https://houseadorable.com/wp-content/uploads/2023/01/316322082_5650827684977137_862859335334204275_n.jpg "Charcuterie Board Vs. Cutting Board [8 Differences]")
![How to Disinfect Wood Cutting Board? [5 Methods]](https://houseadorable.com/wp-content/uploads/2023/01/1466451602030.jpeg "How to Disinfect Wood Cutting Board? [5 Methods]")
![Can You Put A Wooden Cutting Board In The Oven? [Answered]](https://houseadorable.com/wp-content/uploads/2023/01/clean-wooden-cutting-board-4772583_01-2aba9de81be84c55a8e1dbb63822b806-scaled.jpg "Can You Put A Wooden Cutting Board In The Oven? [Answered]")
![Is Acacia Wood Good For Cutting Boards? [Explained]](https://houseadorable.com/wp-content/uploads/2023/01/wood-table-top-with-acacia-chopping-board-with-blur-kitchen-counter-background-is.jpg "Is Acacia Wood Good For Cutting Boards? [Explained]")
![Can You Put Wood Cutting Board In Dishwasher? [Explained]](https://houseadorable.com/wp-content/uploads/2022/12/dish.jpg "Can You Put Wood Cutting Board In Dishwasher? [Explained]")
![Bamboo Vs. Wood Cutting Board [9 Differences Explained]](https://houseadorable.com/wp-content/uploads/2023/01/cutting-board.jpg "Bamboo Vs. Wood Cutting Board [9 Differences Explained]")