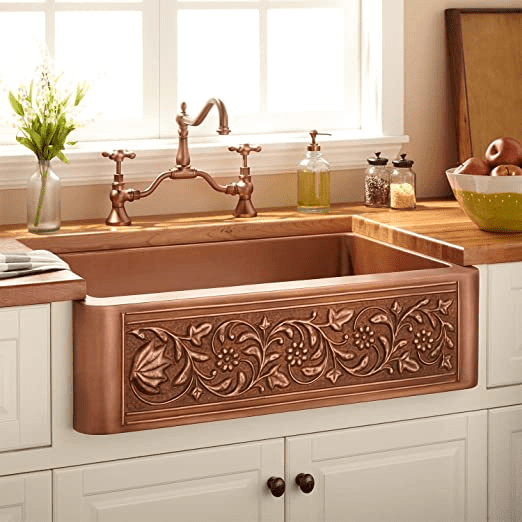
Copper perhaps is the best metal one can use to build sinks. A good quality copper is durable, beneficial to health, and has an alluring appearance, says Havens.
Furthermore, Havens states that copper sinks are easy to clean and maintain because a high-quality copper sink reconditions over time and even exhibits self-healing characteristics.
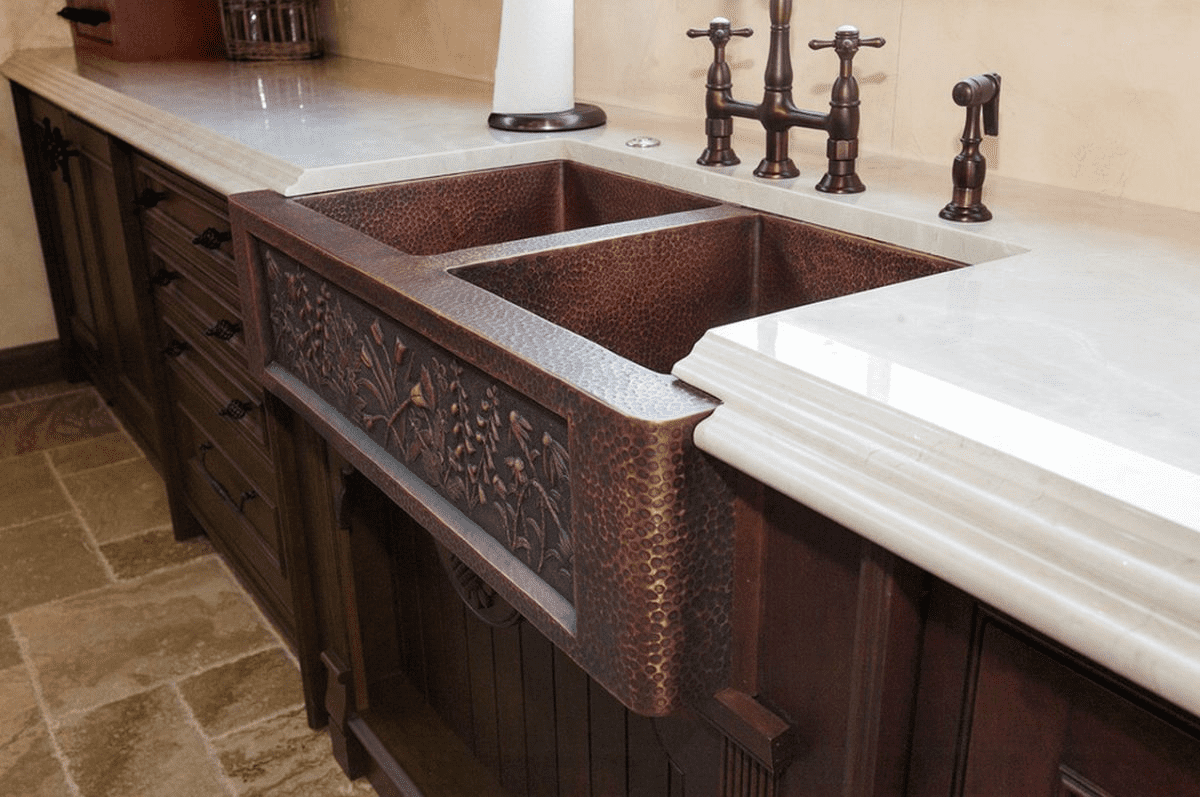
Copper sinks are naturally beautiful carrying -a luxurious rustic character. Once you know how the copper color changes, you will own this metal for years to come for its enticing appearance.
The patina finish of deep browns and rich orange adds to the stunning beauty of your home. However, you only need to take a little extra care to evoke the natural beauty of your copper sinks.
In this article, we’ll walk you through what to expect as a copper sink oxidizes over time and methods about how to darken copper sink to maintain its shine.
Copper Sinks -Explained.
Did you know? : It is a must to buy a copper sink from a manufacturer or supplier who promises to provide a copper sink made with not less than 99% of pure copper and 1% zinc.
Generally, copper sinks are handcrafted using non-recycled 14 gauge USA copper of 48oz with a rating of 99.9% purity and 1% zinc. Copper sinks are the perfect choice for people who want to introduce a beautiful focal point in their homes.
Based on the preferences, copper sinks are available as –
- Smooth copper sinks -a style that is modern or contemporary.
- And hammered copper sinks -a style that is warm, handcrafted, and works well in rustic, ethnic, western, and traditional home decor.
Further, copper sinks also come as-
- Lacquered copper sinks
- Non-lacquered copper sinks
Lacquer is a protective layer applied on the copper sink surface to protect the sink from damage and retain the natural finish of copper.
Usually, people prefer a lacquered sink over an antique finish sink. But, lacquer does not stop the patina process only delays it. Hence, it is not a permanent solution as the lacquer coating might gradually start to fade away, and the patina process will occur, changing the color and look of your copper sinks.
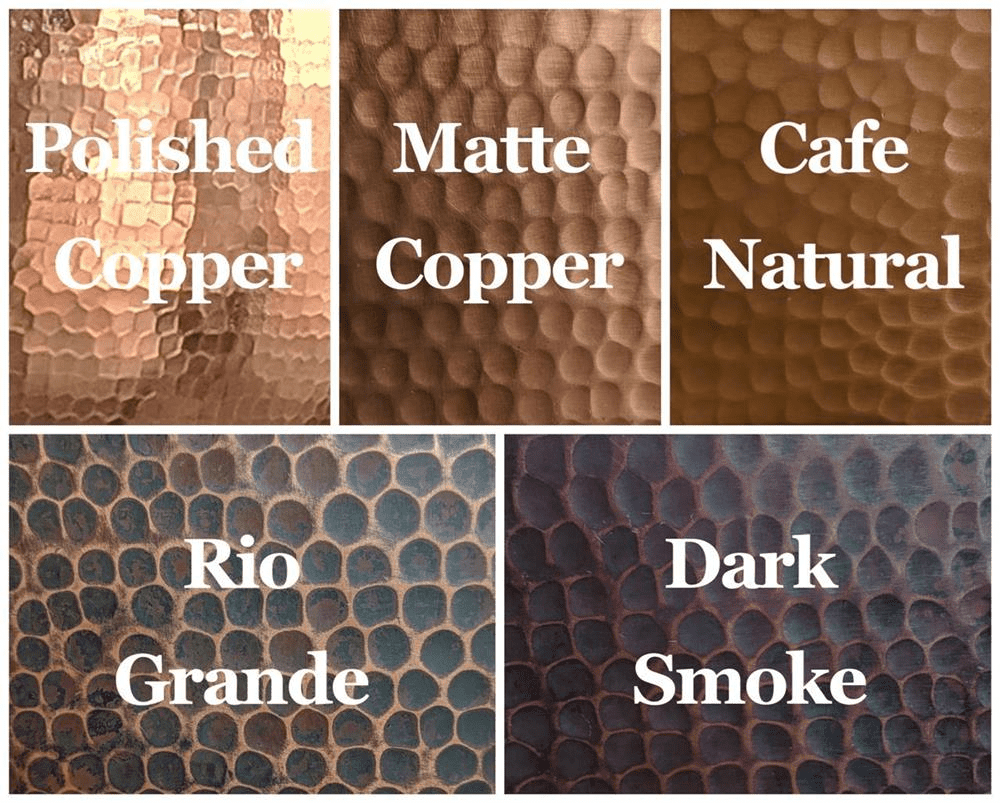
While most naturally occurring copper patinas are green. However, creating a darker patina like dark brown or black on your copper surface is possible. Each method produces a somewhat different color, so you may wish to try several of your copper items to see which result you like best.
CAUTION :
- Ensure that you do not buy a copper sink having lead content as it is toxic for humans.
- Additionally, do not buy copper sinks created using the soldering method because the soldered substance also contains lead.
- Instead, buy a copper sink created through the welding process.
Now, let’s get into the specifics of how you can darken copper sink and add stunning beauty to your kitchens.
4 Different Ways to Darken Copper Sinks:
With a copper sink, discoloration is inevitable; it’s like metal. In addition, the discoloration can occur for many reasons: harsh chemicals, long-term exposure to acidic materials (such as lemons, ketchup, or toothpaste), heavy use, and others.
The good news is that it’s a normal part of having copper products, and there are ways to darken and tarnish your copper sinks.
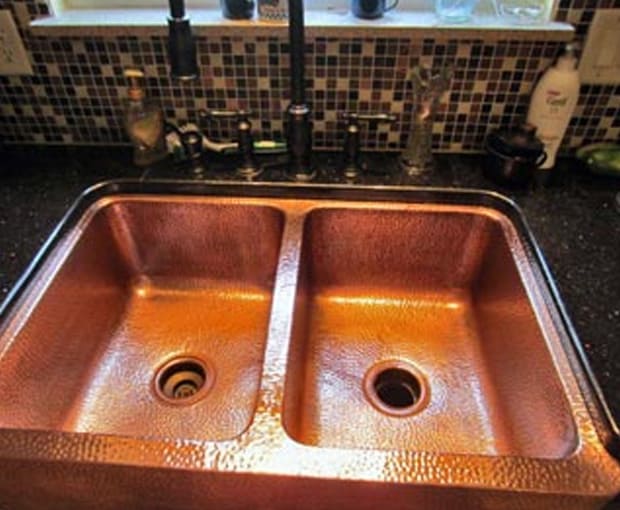
This image shows some copper patinas seen on a copper sink.
So, let us understand different methods and steps to darken our copper sinks naturally, with liver of sulfur, green patina, and brown patina.
One can naturally darken or tarnish a copper sink:
Using Baking Soda and A Solution of Water, Salt, and Vinegar
In this method, baking soda acts as a cleaning agent before treating the sink with salt, water, and vinegar solution.

Follow the given steps to darken your copper sink.
Step 1: To begin, wear gloves as safety precautions to avoid skin damage. Then, clean the copper sink thoroughly using a soft cloth, warm water, and ordinary dishwashing soap. Ensure that no oil, dirt, or food traces are in the sink.
Step 2: Once the sink is clean, drizzle baking soda all over the sink surface and start scrubbing using steel wool or other scrubbing pad. This step will remove any excess coating or buildup on the sink and open the copper sink to oxidize naturally for tarnishing.
Step 3: Clean the baking soda entirely from the sink.
Step 4: Mix one portion of water, salt, and vinegar and form a solution. After the salt dissolves, pour the solution onto the sink.
Step 5: Let the copper surface soak in the solution for at least half an hour. Allow it to air dry instead of wiping it dry. If you want to speed up the process, sprinkle salt over the solution.
Using Liver of Sulfur
The liver of sulfur is an effective method to darken your copper sinks. This chemical compound creates patinas on copper and other metals that look antique.
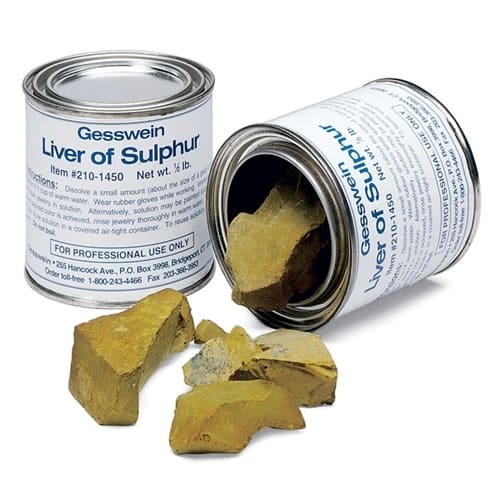
To darken copper sinks, you can use this product in a gel, a liquid, or a lump form. But yes, it does look gross and smell foul; however, it works like a charm! For safety, wear gloves and a mask.
Step 1: Just like we did in the first method, clean the sink using a lint-free cloth and regular dishwashing soap or grease-cutting solution. Remove the dirt and debris from the sink thoroughly.
Bonus Tip -Wear gloves to clean the sink to avoid touching the sink because your fingerprints might taint the sink surface and resist the patina.
Step 2: You can buy a liver of sulfur online or prepare it. To buy a pre-mixed solution (liquid form) of liver of sulfur becomes easy to use.
For a dry form, take a pea-sized piece and split it off. Then, dilute it by adding a cup of water (approx. 240 ml) to a bowl and pouring it in. Make sure the room is well-ventilated. The liver of sulfur solution tends to darken copper incredibly fast.
Warning –The liver of sulfur lumps is flammable and is harmful if inhaled.
Step 3: To start the oxidation process, apply the liver of sulfur onto the clean sink in small and quick applications. Now and then, check the darkness you want on your sink because it can turn copper black quickly.
Step 4: To stop the darkening process after reaching the shade you want, mix baking soda and water in advance. In the case of a sink, you need to prepare enough cleaning solution to cover the whole sink surface. Use a rag instead of soaking the entire sink in the solution.
Step 5: Wipe the sink with a clean towel until dry. Polishing paper or pads can be used to achieve shine. For maintaining the shine, buff it with a polishing cloth regularly.
Vinegar, Salt and Ammonia for Green Patina
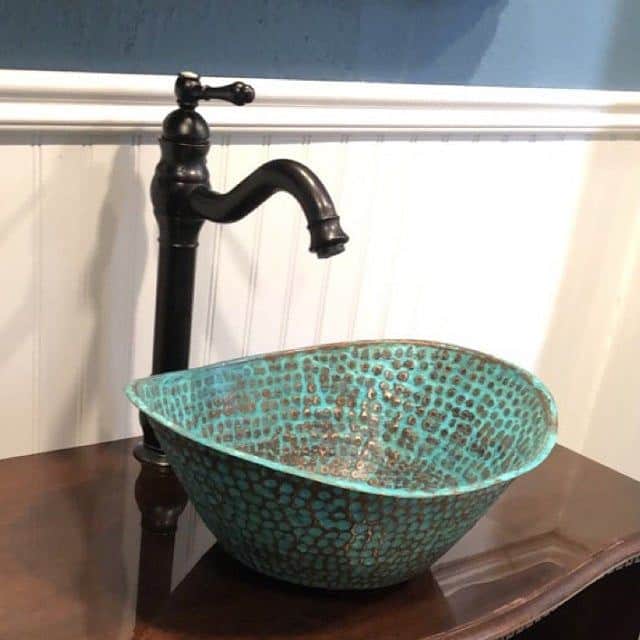
Generally, green patina is a natural shade of copper. For tarnishing your copper sink using green patina,
Step 1: Clean the copper sink thoroughly with a soft sponge and soap.
Step 2: Combine two portions of white vinegar, half portion of non-iodized salt, and one and a half portions of clear and detergent-free ammonia solution to make the darkening solution. Pour this solution into a non-corrosive spray bottle.
Step 3: Spray the solution evenly over the sink surface and cover every corner of the sink as well.
Step 4: Leave the solution to its work for at least an hour.
Step 5: Repeat the spraying process if any areas are left. It is just a question of trial and error and figuring out which dark shade you desire.
Step 6: Upon drying, patinas have a powdery green finish. It is best to leave the powder to sit overnight without rubbing it.
Note -Lessen the salt concentration in the green patina repair solution to reduce the intensity of the green shade.
Over time, the green finish will become permanent. If you rub off the excess powder, the finish will be ruined. Hence, for better results, let it sit for a minimum of six hours.
Using Baking Soda for Brown Patina
If you want a dark brown shiny copper sink, the best method is to use a brown patina.
Step 1: Clean your copper sink with a lint-free rag and soap water to remove the dirt.
Step 2: Put baking soda in hot water until thoroughly dissolved. Fill a spray container with a thin mist to avoid droplets that might form streaks.
Step 3: Now, spray the solution evenly onto the sink surface and cover every part of the sink. Cotton swabs dipped in the solution can be used for hard-to-reach corners.
Step 4: Let the solution air dry. Wiping at this stage will affect the finish, and hence, allow it to rest for at least one hour for drying completely.
Step 5: Repeat the process until you achieve the dark shade you desire.
Unlike green patina, the brown patina will give you a smooth surface at the end of the process.
The methods given till now are time-consuming, but the following method is comparatively less time-consuming.
Warning -Do not throw items used for copper sink patina in the dustbin as they are considered hazardous wastes. Hence, dispose of these items carefully.
Want to Darken Copper Sink Quickly?
With the mixture of vinegar, ammonia, and table salt, you can achieve your desired dark shade to your copper sinks.
source cdn.homedit.com
Step 1: Begin by mixing a cup of vinegar, ¾ cup of ammonia, and ¼ cup of salt in a bowl.
Step 2: For a sink, using a soft brush and cloth, apply this mixture all over the sink.
Step 3: Keep reapplying coats of this solution until you have attained the desired dark shade for your copper sink.
Step 4: Let it air dry.
Caution -Always wear gloves, goggles, and masks to minimize skin exposure while handling pure ammonia.
Darkening copper sink can be fun because you can try different methods and decide the shade yourself. You can have different copper finishes if you use the methods mentioned above.
![What Are Kitchen Sinks Made Of ? [13 Types+Pros & Cons]](https://houseadorable.com/wp-content/uploads/2022/01/Sink-MAterial.jpg "What Are Kitchen Sinks Made Of ? [13 Types+Pros & Cons]")
![Granite Vs. Marble Vs. Quartz Countertops [12 Differences+Pros & Cons]](https://houseadorable.com/wp-content/uploads/2022/03/quartz-marble.jpg "Granite Vs. Marble Vs. Quartz Countertops [12 Differences+Pros & Cons]")

![16 Types of Kitchen Cabinet Finishes [Features + Pros & Cons]](https://houseadorable.com/wp-content/uploads/2022/10/cabinet-finish.jpg "16 Types of Kitchen Cabinet Finishes [Features + Pros & Cons]")

![Ceramic vs Stainless Steel Sink [A Detailed Analysis]](https://houseadorable.com/wp-content/uploads/2021/12/Ceramic-vs-ss.jpg "Ceramic vs Stainless Steel Sink [A Detailed Analysis]")

![16 Types of Kitchen Faucets Explained [With Pros + Cons]](https://houseadorable.com/wp-content/uploads/2023/02/Roca_griferia_cocina_mencia_negro_DEF_900x505_acf_cropped-1@2x-250x250.jpg "16 Types of Kitchen Faucets Explained [With Pros + Cons]")